Joystick
|
||
Introduction of Micro:bit
Brief introduction
Micro:bit is a kind of pocket computer, which can make you have a better understanding of how the software and hardware can work synergistically. It is equipped with a LED light displayer, button, sensor, wireless, and many input and output functions. When programming, it can interact with you. You will learn hardware and software, which can bring you lots of fun in product development and programming. You can have a good knowledge of how the input, output and processor of the micro:bit is working, and the micro:bit can help you understand the working principle of the computer. When you are typewriting in the computer or touching screen on the phone, you are using an input device, which allows computer to perceive things that happen in the real word. Therefore, they can take actions according to above to make some things happen, which is usually in screen, sound and other output end.

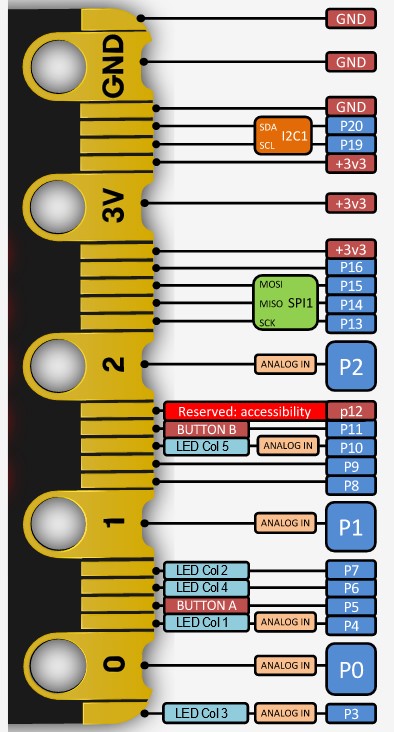
Introduction of Golden Finger Interface
What should you prepare?
A computer or tablet which can surf the Internet in order to load Microsoft MakeCode or Python coding editor. A USB cable is needed to link to your micro:bit mainboard.
Programming method
At present, we have two programming language: Makecode and Python. Makecode is equipped with graphic building block programming and Javascript programming. Makecode graphic building block programming is more suitable for beginners, while Javascript or Python programming is fit for someone who have some foundation.
Begin to learn
In the next chapter, we will learn how to build Makecode programming environment. And then the next chapter we will learn how to make the micro:bit work, program its functions and create your first project.
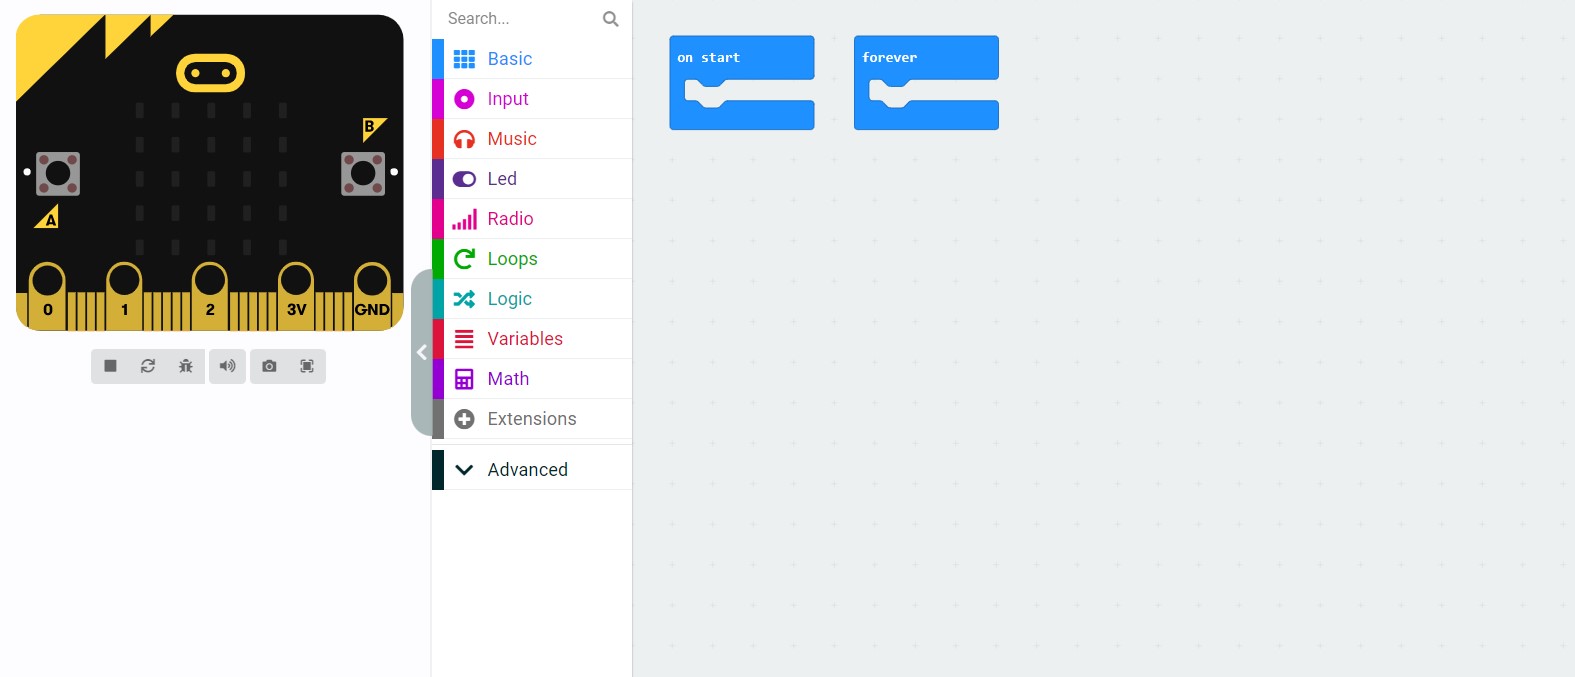
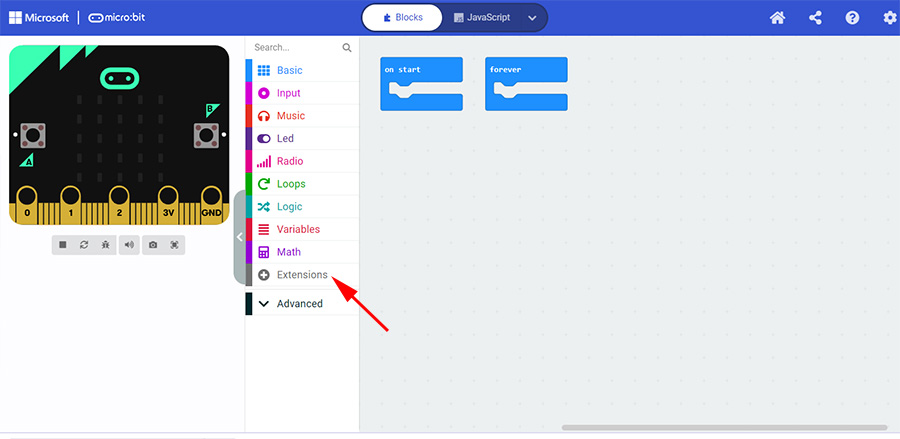
Build Makecode Programming Environment
We can choose on-line programming or off-line programming, both of which are available.
On-line programming
Enter the following website address directly, which is the most simple and fast method.
https://makecode.microbit.org/
Off-line programming(You can choose any of the following ways)
First: Execute the program “makecode-microbit-setup-win64.exe” to enter programming environment.
http://wiki2.haljia.com/download/microbit/smartrobot/makecode-microbit-setup-win64.exe

Second: Enter the following link to download the software of off-line programming.
https://makecode.microbit.org/offline-app
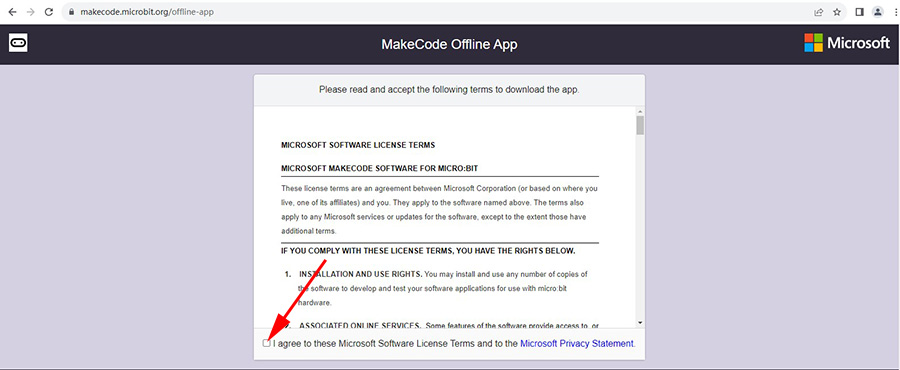
Click the position the arrow points at to enter the following page.
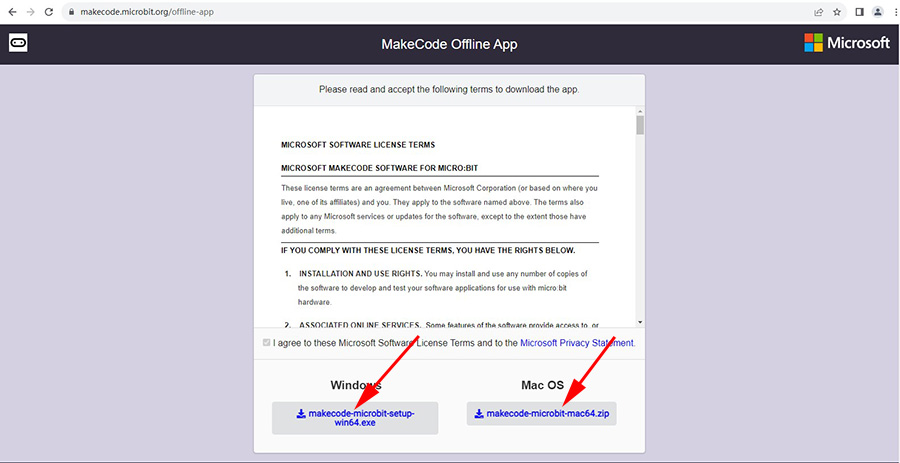
If you are Windows system, please click makecode-microbit-setup-win64.exe to download. If you are Mac OS system, please click makecode-microbit-mac64.zip to download. Having finished installation, please open MakeCode for micro:bit as shown below:

Third: Search MakeCode for micro:bit in Microsoft Store to download.
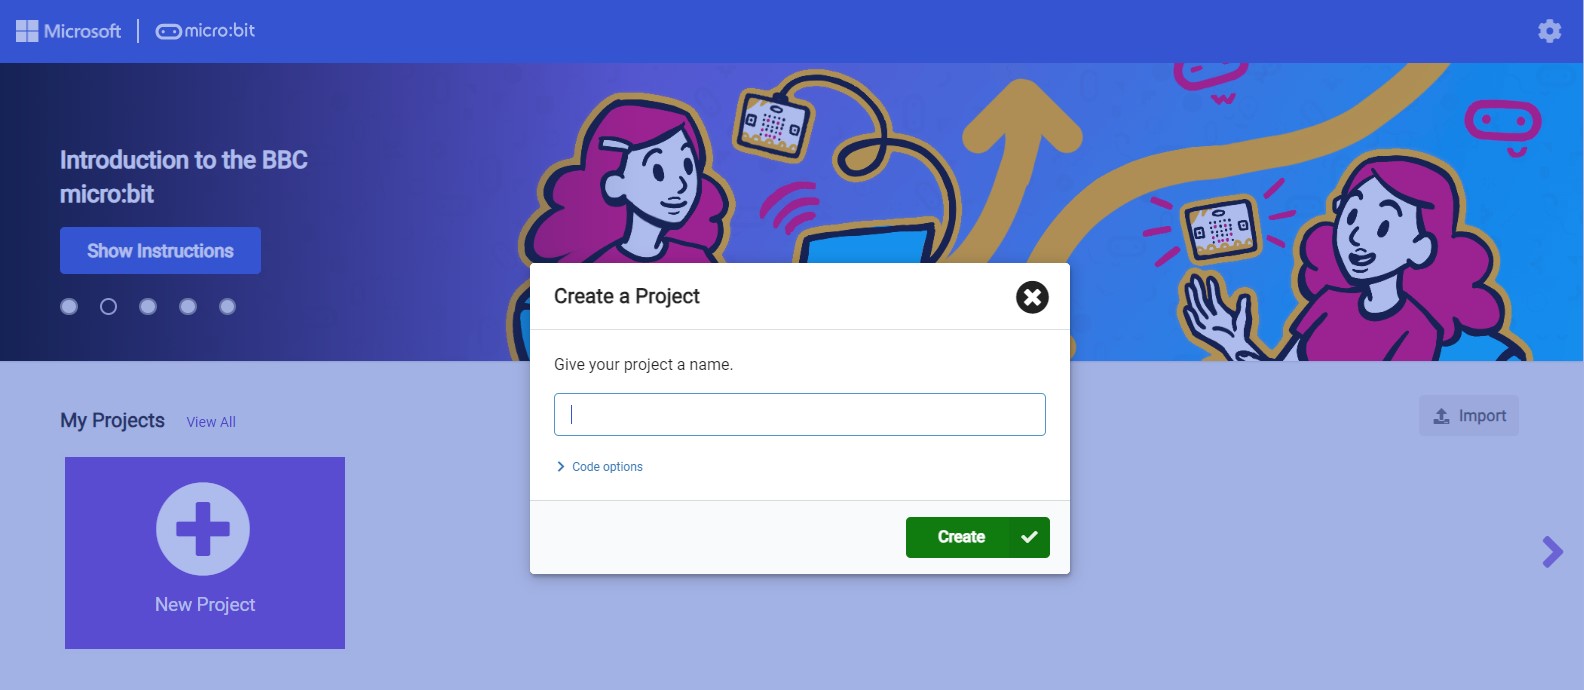
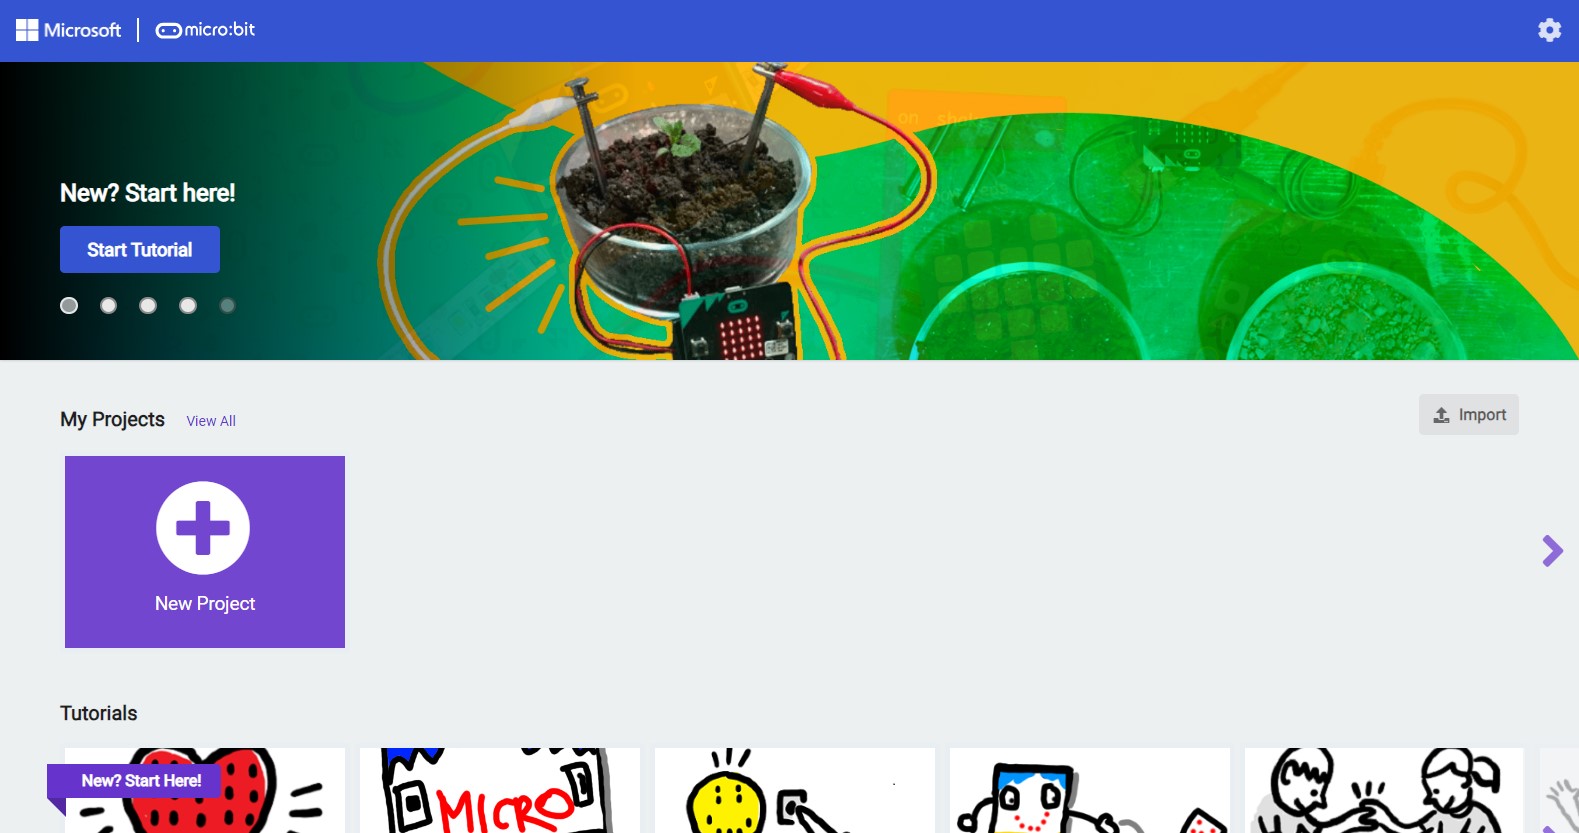
Create new project

Click “New Project” and then start to program.
The First Project
Learning content
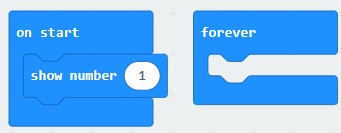
1.We should make the screen of micro:bit board display the number “1” through Makecode building block programming.
2.We should learn how to import finished project.
Start to program
Open the Makecode and begin our first journey:
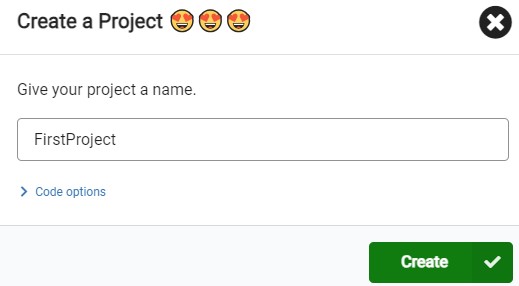
Click “New Project”, input the name of the project and then click “Create”.
The middle function bar can implement many functions, and you can click them one by one to have a look.
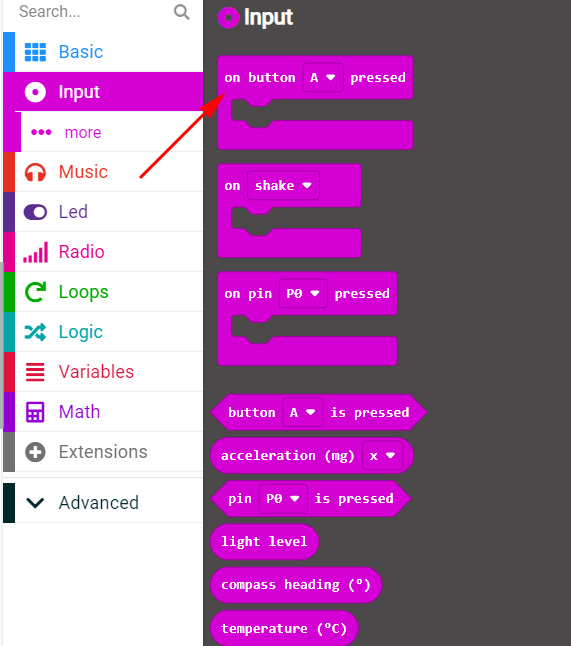
There we click “Basic”:
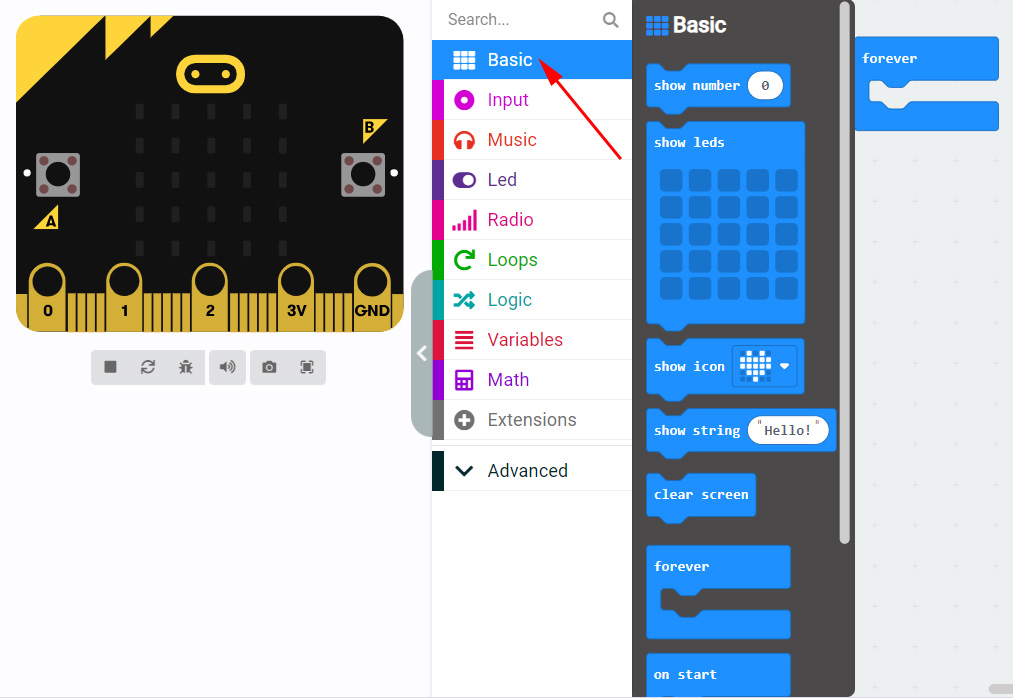
We should drag the show number “ ” to “on start”.
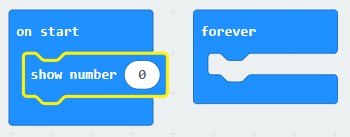
Alter the number “0” to “1”.
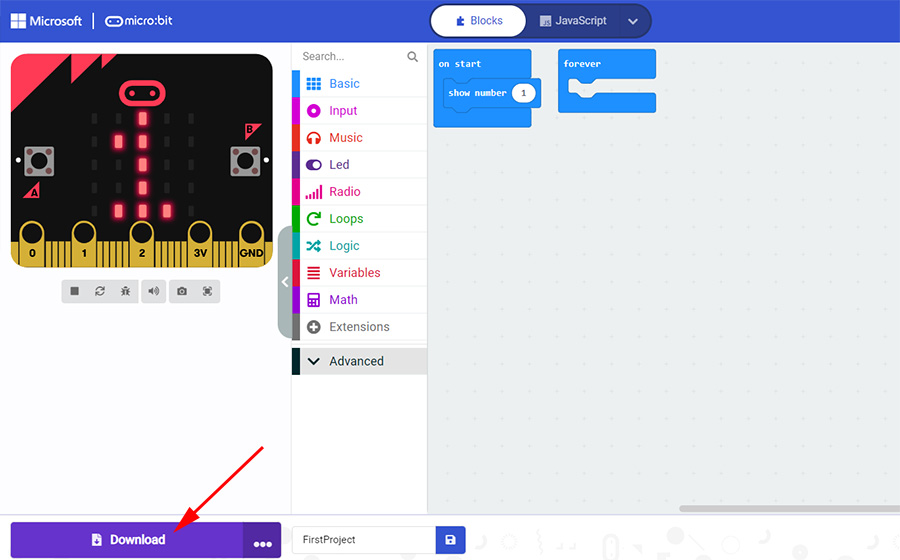
After having finished the project, click “Save” according to the following arrow:

We save it as "FirstProject.hex”.
http://wiki.haljia.com/download/microbit/joystick/FirstProject.hex
Note:When we save files, we should add extension name ".hex". Otherwise, the file may not be used normally when we import it.
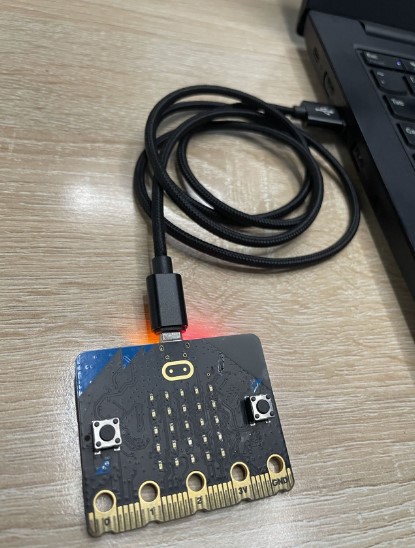
Then connect the Micro:bit board with computer through USB cable.
Click “Download” to download the program to Micro:bit.
Start to test
There will display number ”1” in the LED screen when the micro:bit board is powered on. Then, we have finished our first project.

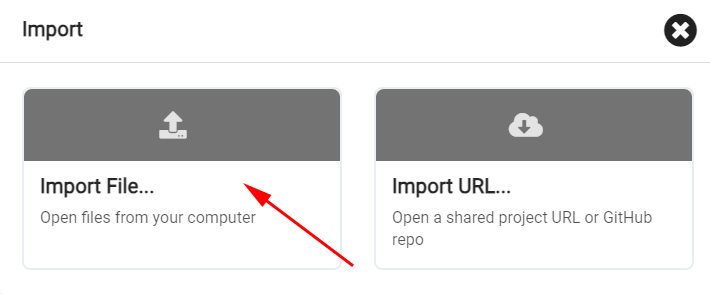
Import project
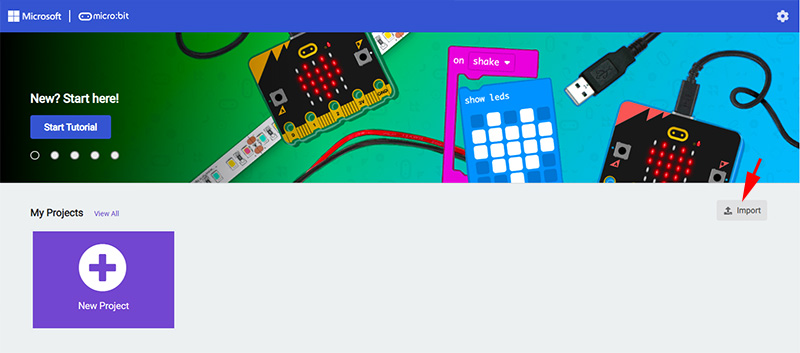
Load the program “FirstProject.hex” referring to the following operation order. Click “Import” first:
http://wiki.haljia.com/download/microbit/joystick/FirstProject.hex
Import file:
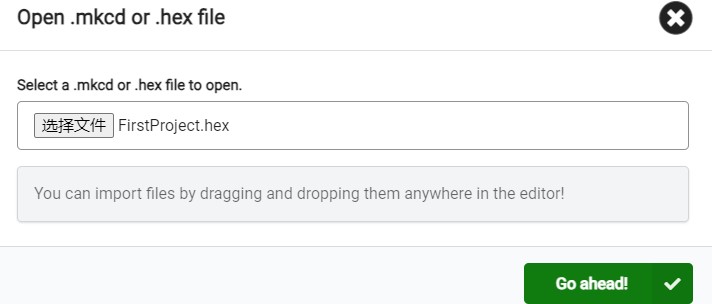
Choose file:
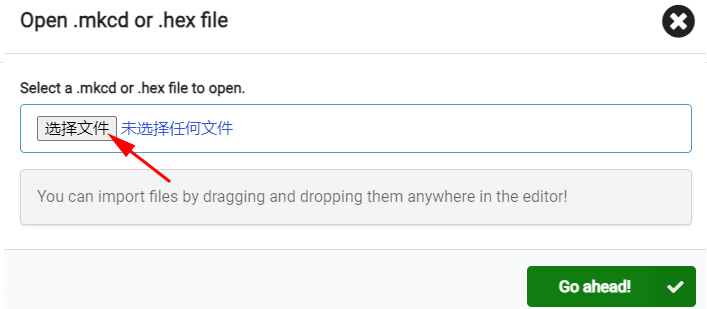
We should choose file with ".hex" extension name, or it can’t be opened.

Play Music
Learning content
1.We will implement music-playing by Makecode building block programming;
2.We will learn how to program the button of micro:bit;
3.We will learn the programming of music function.
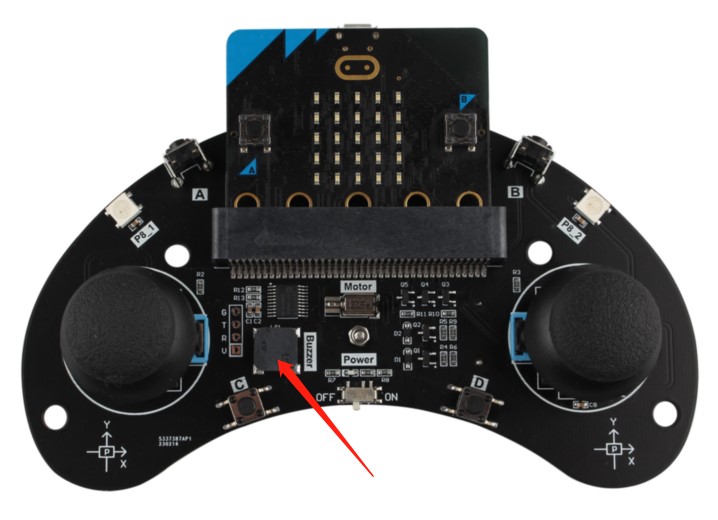
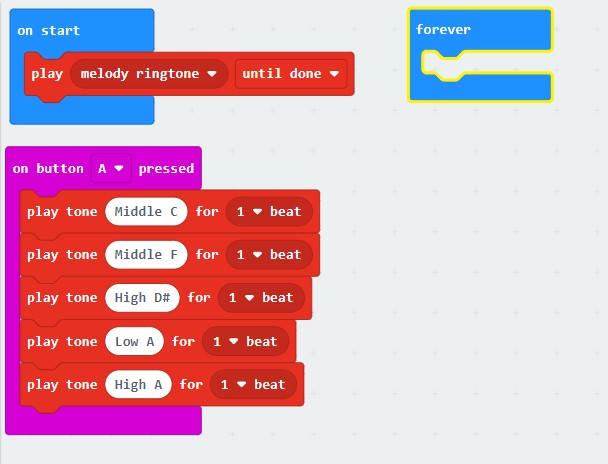
Buzzer music-playing
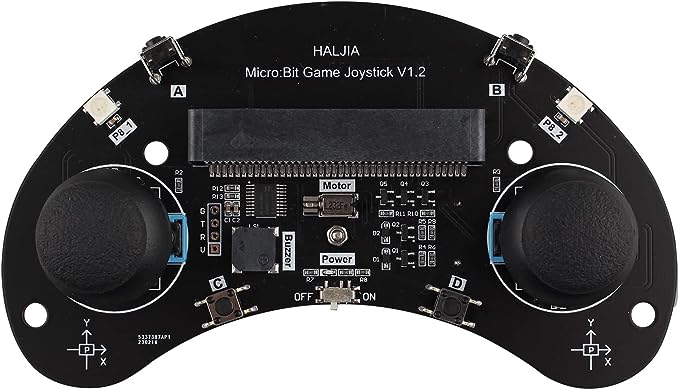
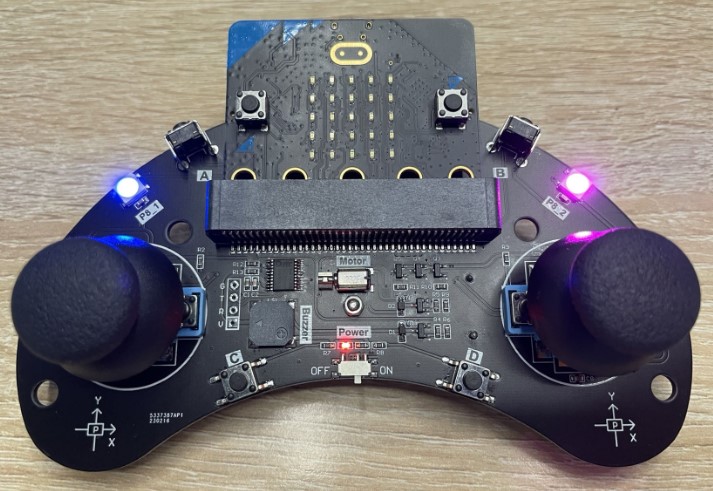
The joystick is equipped with buzzer which can play music. The component the arrow points at is what called buzzer.
Start to program
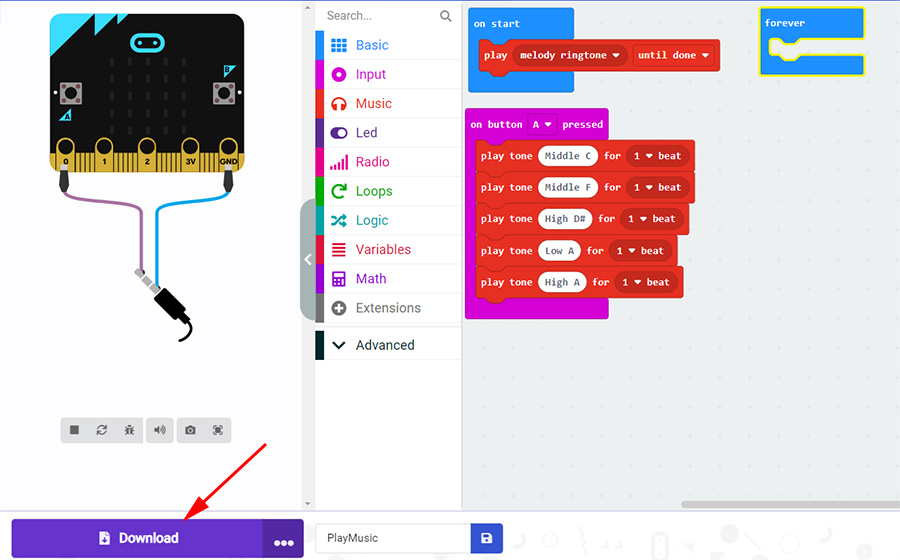
Open Makecode and begin our programming:

Create a new project named “PlayMusic”.
We can implement music function according to the page below:
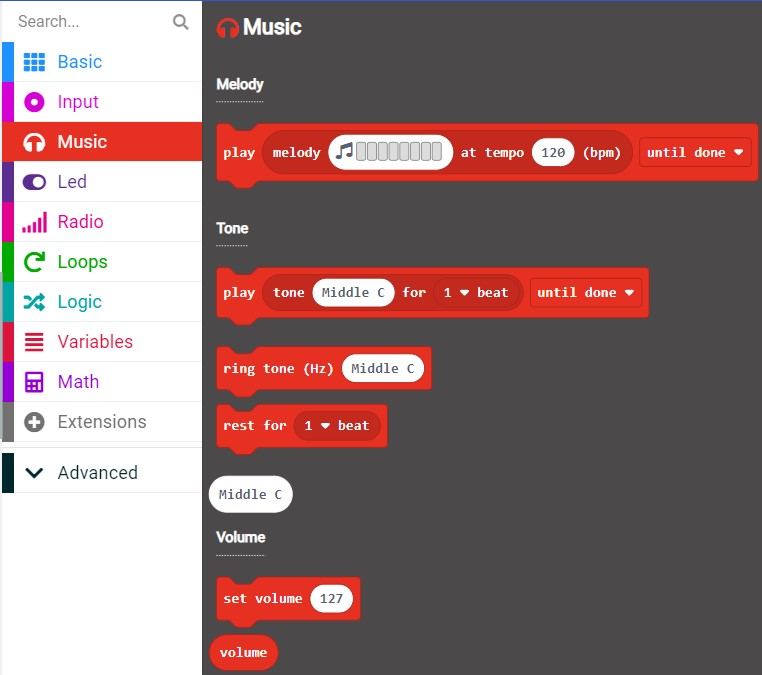
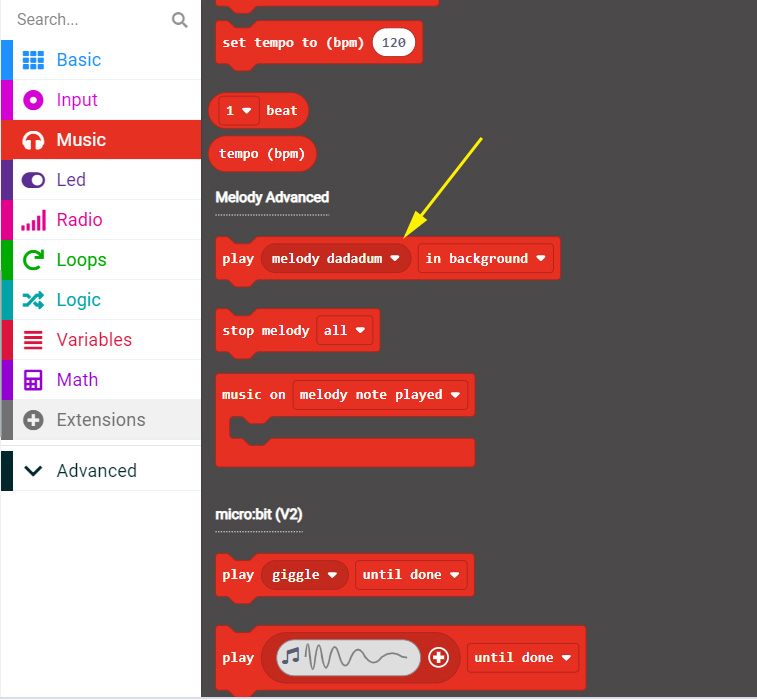
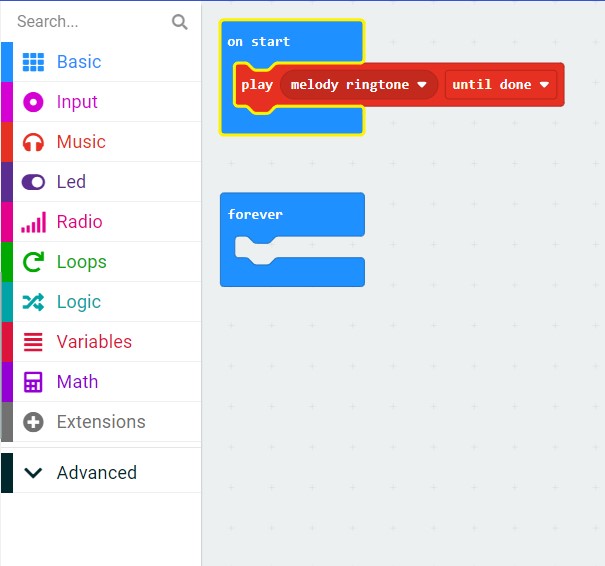
We choose to play the melody and the ringtone will be played when it’s powered on.
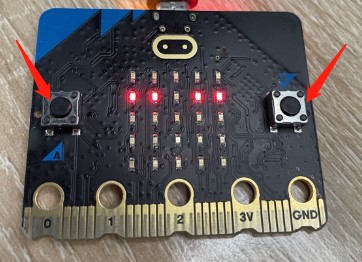
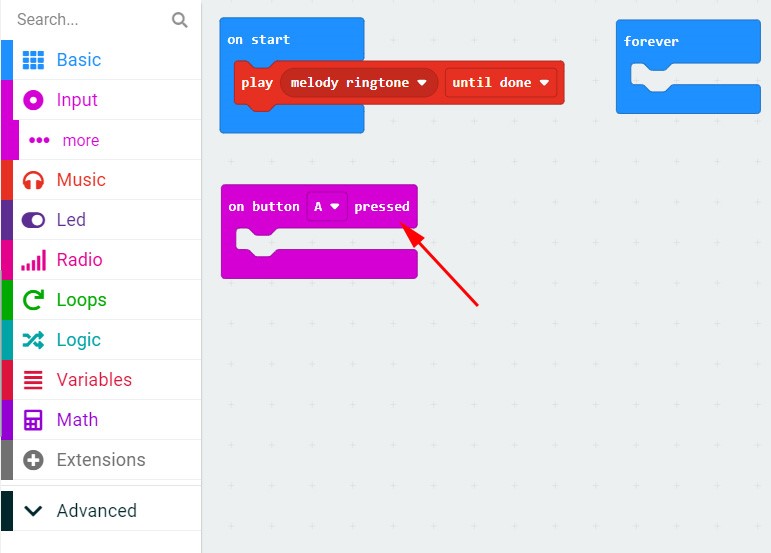
There are button A and button B in the micro:bit board. We can execute project by pressing the button.
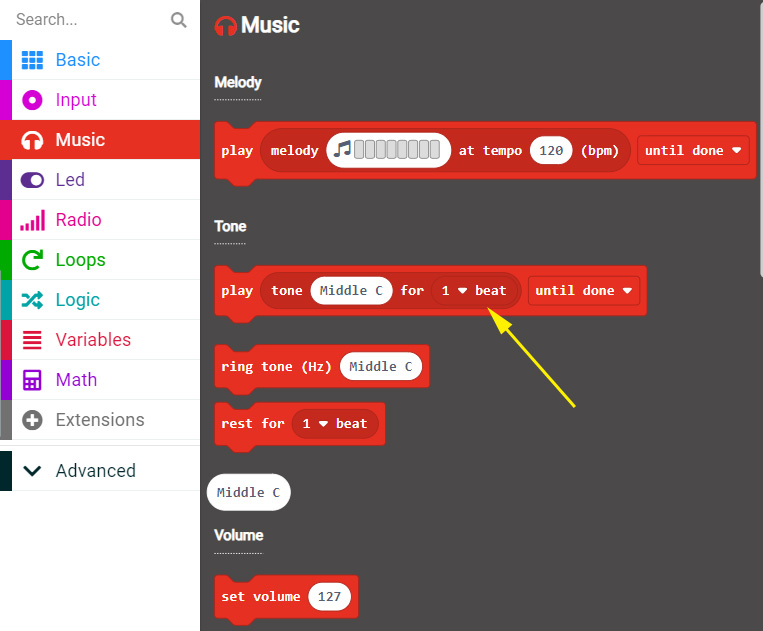
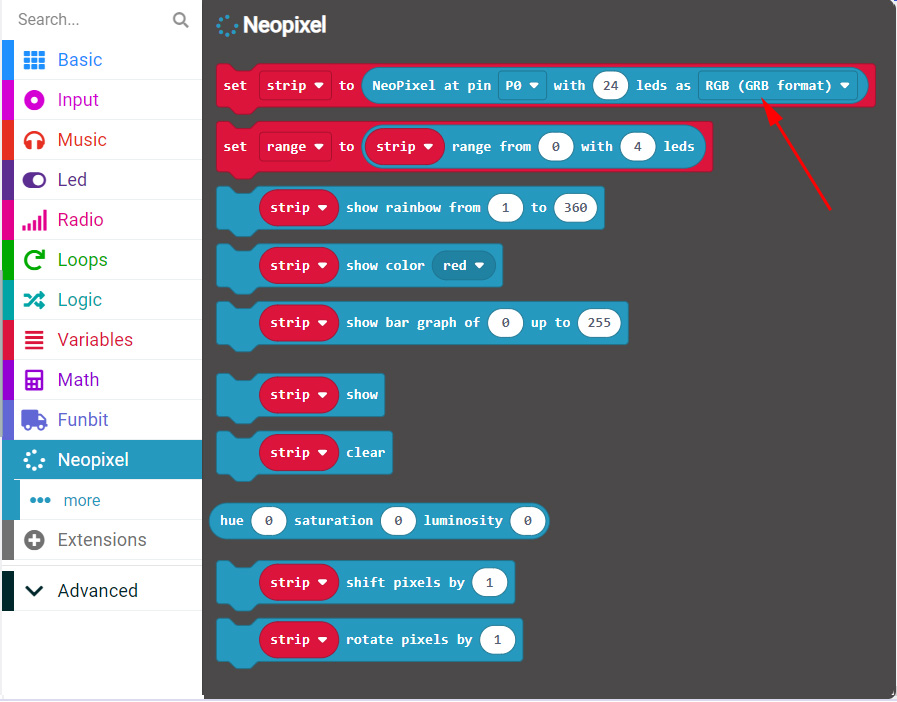
We can also play the song according to the music score and select the corresponding tone and beat. The yellow arrow in the picture below indicates the function of playing the tone:
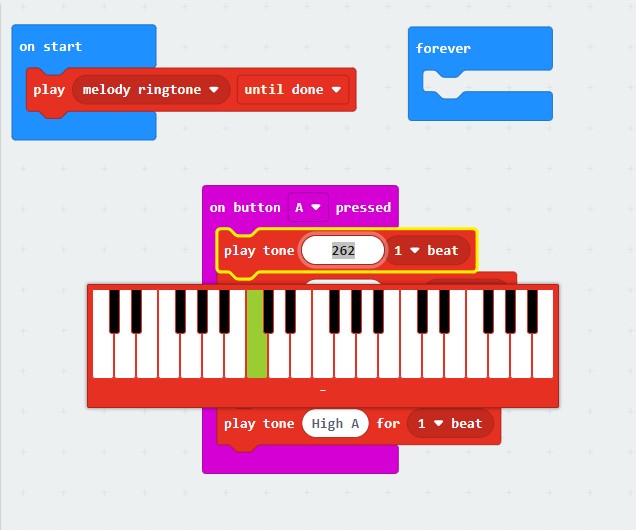
There we write a piece of music at will. You can play it by pressing the button A in the micro:bit board.
The written program “PlayMusic.hex” can be imported directly.
http://wiki.haljia.com/download/microbit/joystick/PlayMusic.hex
Download the program to micro:bit.
Start to test
After the car is powered on, it will play a piece of music. When we press the button A, it will play the tone we have written.
Have Fun with Dazzling Light
Learning content
1.We will learn to implement the control of the opening and color of the dazzling light by programming;
2.We will learn to use the function of neopixel extension library of the dazzling light;
3.We will learn to program the button A and button B of the micro:bit board.
Start to program
Open Makecode and begin our programming:

Create a new project “RGBLight”.
And then enter the following page:
Click “Extensions” and input “neopixel” in the search bar. Click the neopixel library and enter:
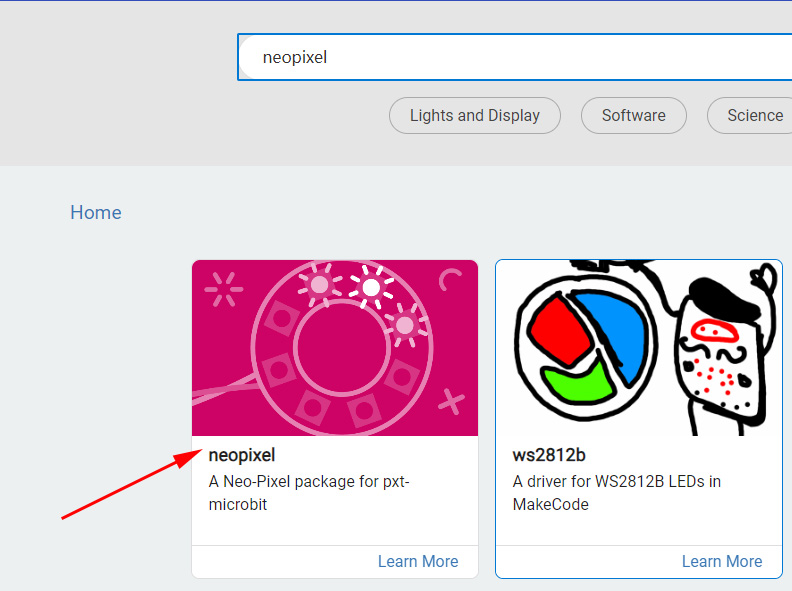
Then there will be a neopixel library in the page:
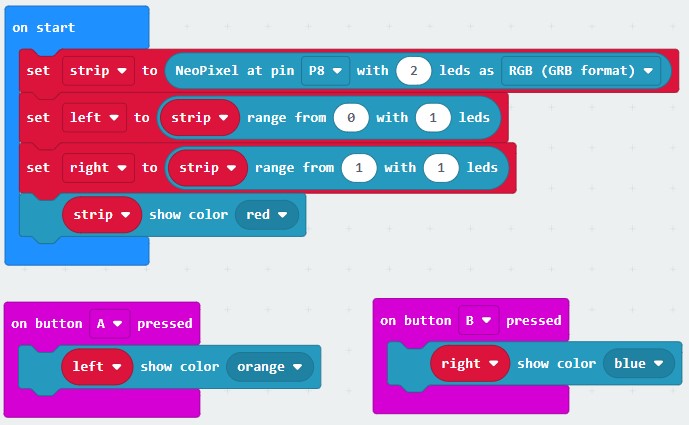
When the car is powered on, we set it up this way that the P8 port of the car should link 2 LED lights.

We will use the button A and button B of the micro:bit board.

Program as shown below:
You can also import the written program “RGBLight.hex” directly.
http://wiki.haljia.com/download/microbit/joystick/RGBLight.hex
Start to test
Download the program to micro:bit board.
When the car is powered on, the two LED lights display red light.
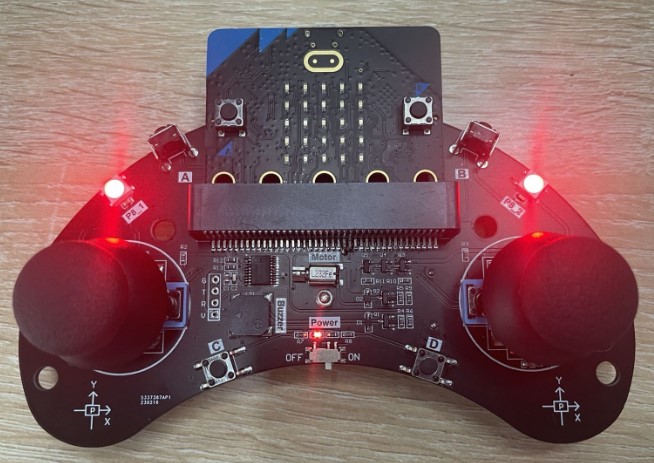
Press the button A of the Micro:bit board to make the left LED light display orange, and press button B to make the right LED light display blue.
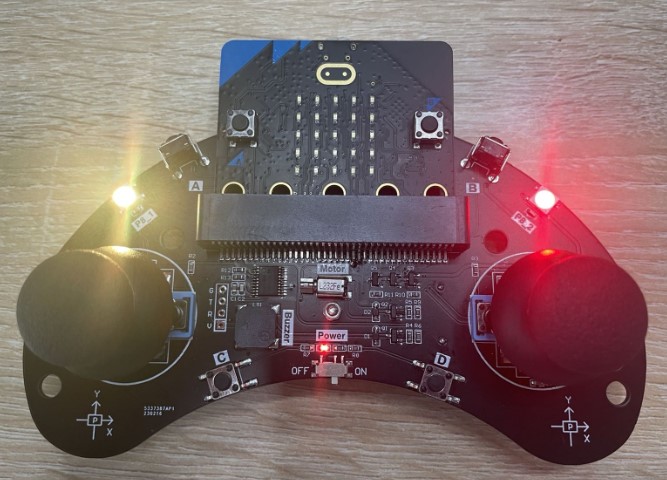
Press button A
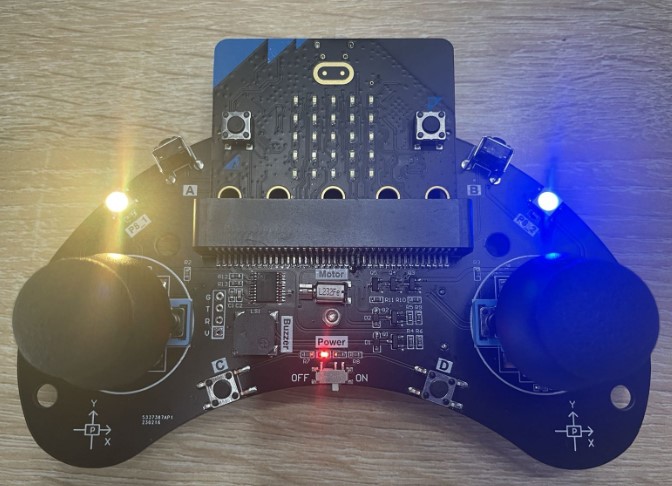
Press button B
Button and Vibration Motor
Learning content
1.Here we program to implement the control of the vibration motor.
2.Learn to program the button C and button D of the joystick.
Introduction of button and vibration motor
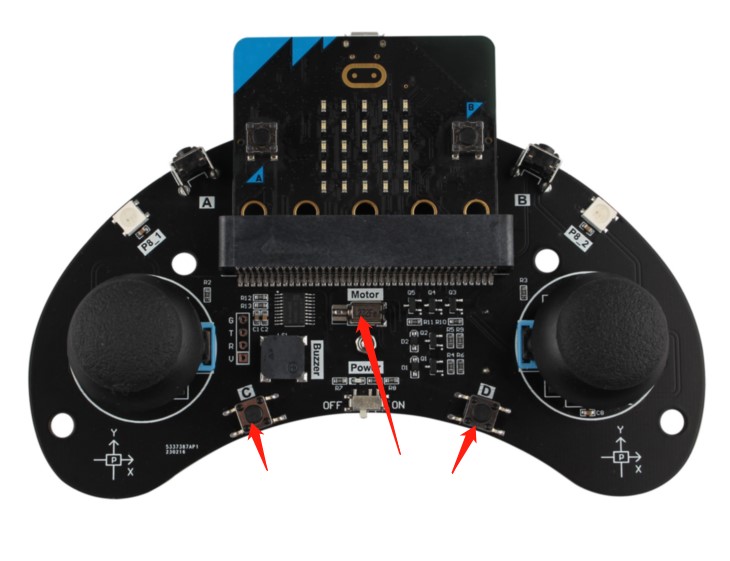
The middle arrow points to vibration motor and the other two arrows point to button C and button D.
Start to program
Open Makecode and begin our programming:
Create a new project “ButtonVibrationMotor”.
And then enter the following page:
Click “Extensions”:
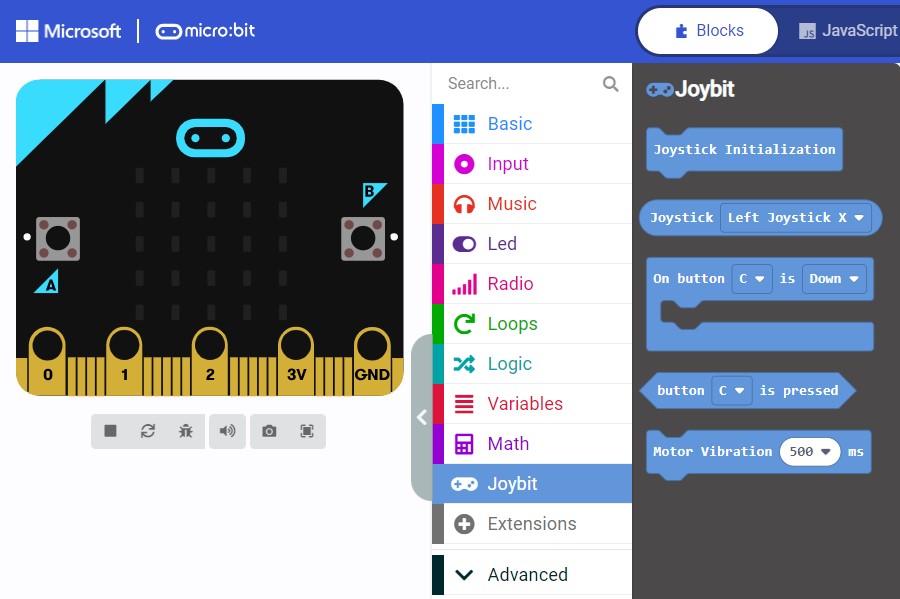
Add the Joybit extension library of the joystick:
https://github.com/szhengjiaanv/Joybit

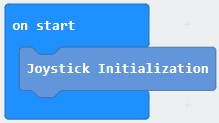
Initialize the joystick in “on start”:
Here we will use the button of the Joybit to deal with functions:
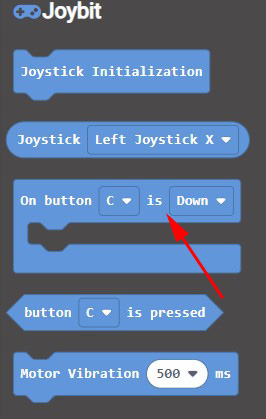
Press button C to make the motor vibrate 500ms, and press button D to make the motor vibrate 2 seconds:

The written program “ButtonVibrationMotor.hex” can also be imported.
http://wiki.haljia.com/download/microbit/joystick/ButtonVibrationMotor.hex
Start to test
Download the program to micro:bit board.
Install two AAA batteries and then press the power switch. After the joystick is powered on, if we press the button C, the motor will vibrate 500ms; if we press the button D, the motor will vibrate 2 seconds.
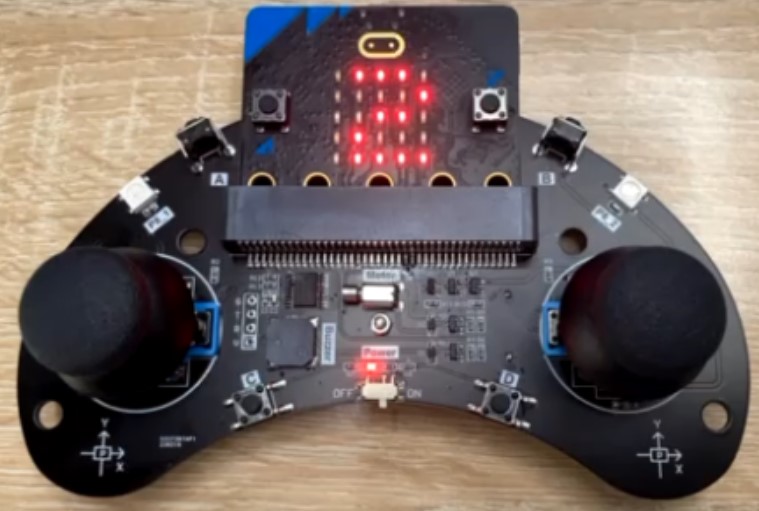
The Left and Right Joysticks
Learning content
We will learn to program the left and right joysticks.
Introduction of joysticks
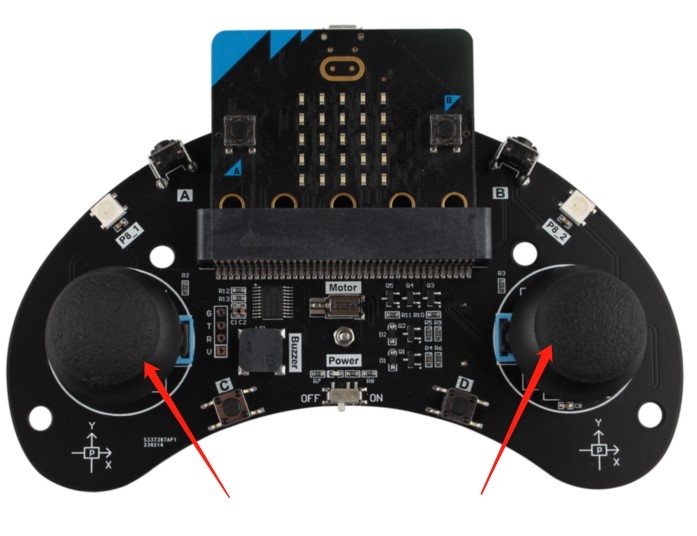
The arrows point to the left and right joysticks.
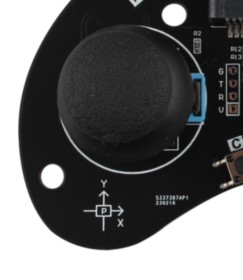
As shown above, the joystick has two orientations: X axis and Y axis.
The X-axis values from left to right are 0~255, with a median value of 128.
The Y-axis values from left to right are 0~255, with a median value of 128.
Later we can program to get the X-axis values and Y-axis values.
Start to program
Open Makecode and begin our programming:
Create a new project “Joysticks”.
And then enter the following page:
Click “Extensions”:
Add the Joybit extension library of the joystick:
https://github.com/szhengjiaanv/Joybit
Initialize the joystick in “on start”:
Here we will use the button of the Joybit to deal with functions:
Set the variable “mode” of button A, button B, button C and button D to different values:
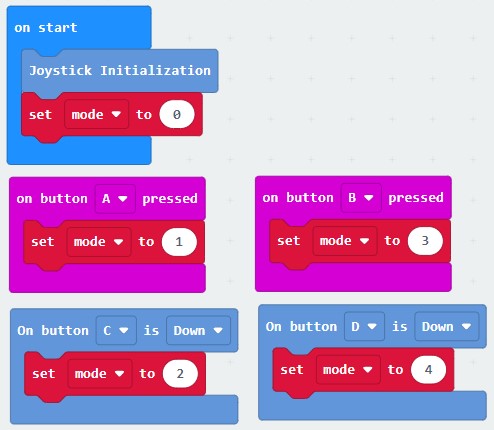
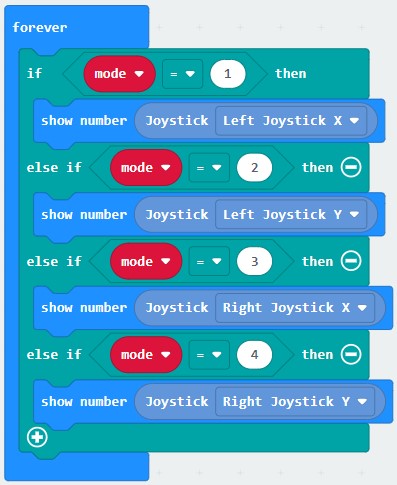
Press button A, the micro:bit board will display the X-axis values of the left joystick;
Press button B, the micro:bit board will display the X-axis values of the right joystick;
Press button C, the micro:bit board will display the Y-axis values of the left joystick;
Press button D, the micro:bit board will display the Y-axis values of the right joystick.
The written program “Joysticks.hex” can also be imported.
http://wiki.haljia.com/download/microbit/joystick/Joysticks.hex
Start to test
Download the program to micro:bit board.
Install two AAA batteries and then press the power switch to turn on the joystick.
Press button A, the micro:bit board will display the X-axis values of the left joystick;
Press button B, the micro:bit board will display the X-axis values of the right joystick;
Press button C, the micro:bit board will display the Y-axis values of the left joystick;
Press button D, the micro:bit board will display the Y-axis values of the right joystick.
We can push the joystick up, down, left and right to look at the values’ variation from 0 to 255.
The X-axis values from left to right are 0~255, with a median value of 128.
The Y-axis values from left to right are 0~255, with a median value of 128.
Control of the Joystick
Learning content
1.Learn to program the joystick to control the smart car.
2.Learn the programming of the two micro:bit boards’ wireless communication.
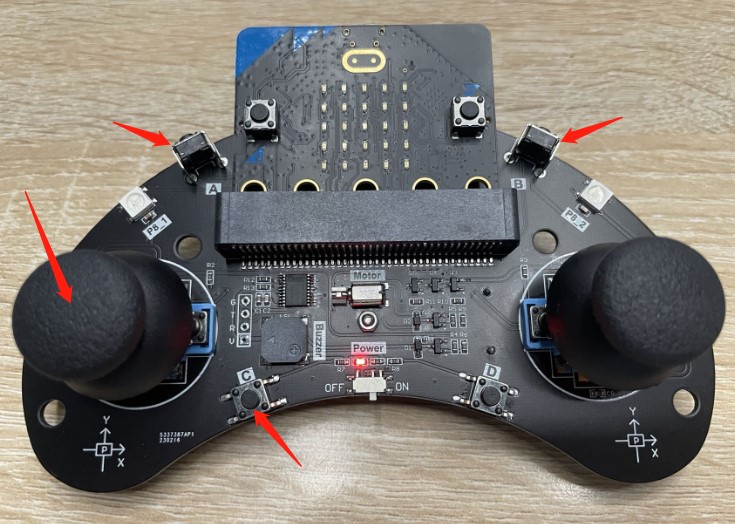
Joystick
We can use the following joystick to control the car:

Our joystick is equipped with power switch, two joysticks, four buttons(A B C D), and two colorful LED lights. We can control the car to forward and backward by buttons or joysticks.
The joystick connects with the car wirelessly. And we need to buy the car first.
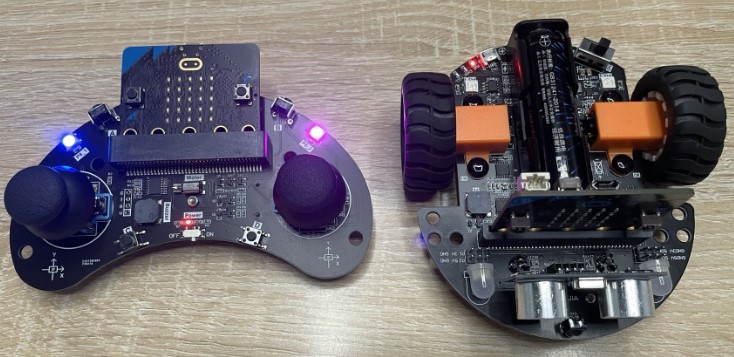
Through wireless connection, the micro:bit of joystick can communicate with the micro:bit of the car, receive and send commands to implement the joystick’s motion control to the car.
Program the joystick
Create a new project “Joystick” and load the extension library:
https://github.com/szhengjiaanv/Joybit
There is also the function of “Radio” as shown below:

Start our programming:
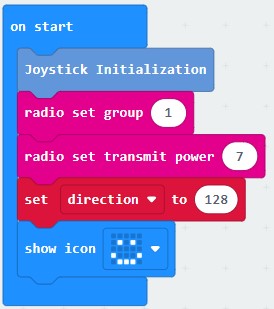
The radio set group should be “1”, which should be the same with the car.
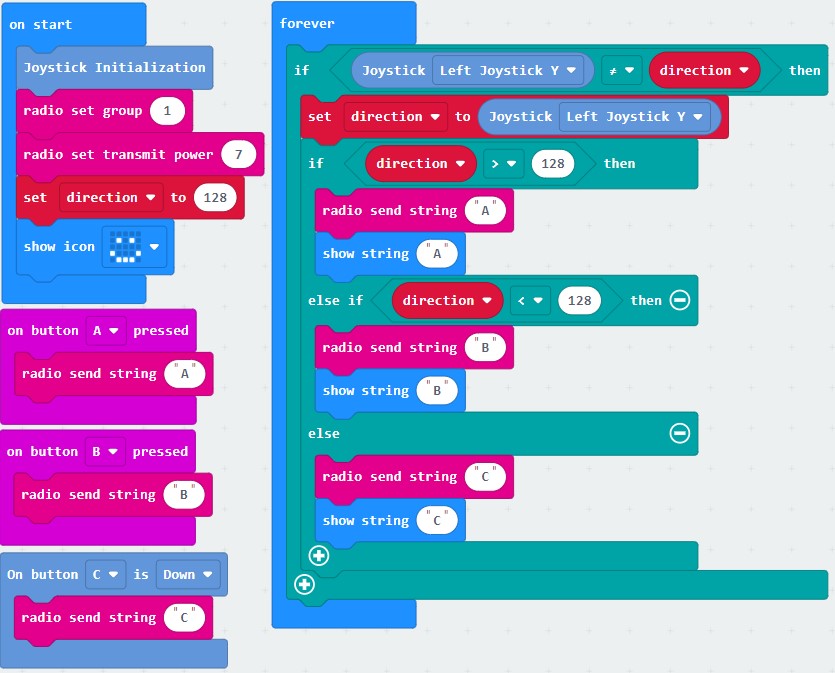
Push the left joystick forward and the Y-axis value is greater than 128, then the car will move forward. The joystick will send “A” command to the smart car and after the car receives “A” command, it will move forward.
Pull the left joystick backward and the Y-axis value is less than 128, then the car will move backward. The joystick will send “B” command to the smart car and after the car receives “B” command, it will move backward.
Loosen the left joystick and the Y-axis value is equal to 128, then the car will stop moving. The joystick will send “C” command to the smart car and after the car receives “C” command, it will stop moving.
Press button A to send “A” command to the smart car and after the car receives “A” command, it will move forward.
Press button B to send “B” command to the smart car and after the car receives “B” command, it will move backward.
Press button C to send “C” command to the smart car and after the car receives “C” command, it will stop moving.
We can also import the written program “Joystick.hex” directly.
http://wiki.haljia.com/download/microbit/joystick/Joystick.hex
Download the program to micro:bit board.
Program the car
Create a new project “WirelessCar” and load the extension library:
https://github.com/szhengjiaanv/pxt-Funbit
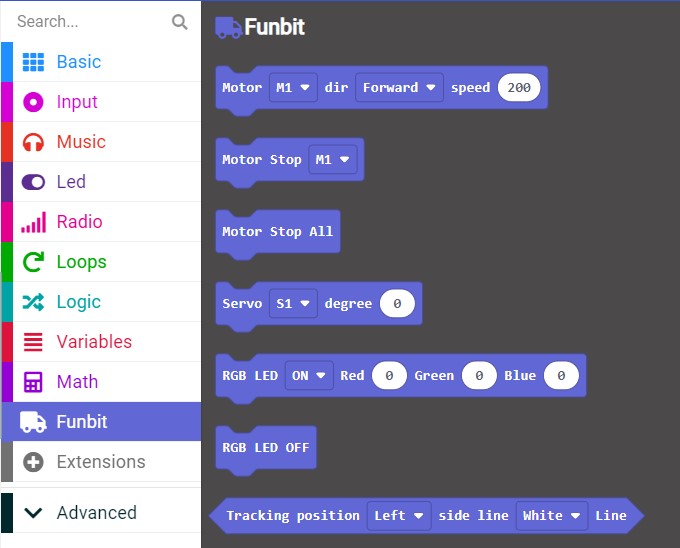
There is also the function of “Radio” as shown below:

Start our programming:
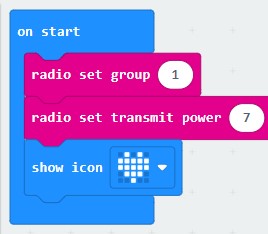
We should set radio set group and transmit power when the car is powered on.
The radio set group of the car should be the same with the joystick. If the car’s radio set group is 1, then the joystick’s should be 1. Otherwise, it can’t connect wirelessly and can’t control the car.
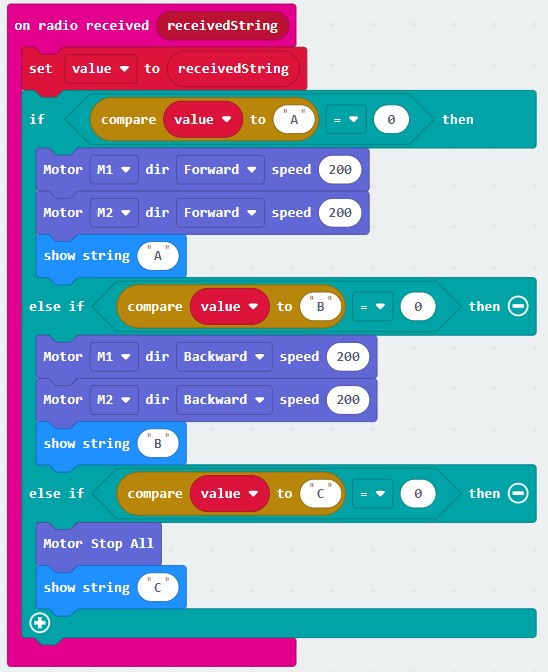
When the car receives the order “A”, it will move forward. When receiving the order “B”, it will back off. When receiving the order “C”, it will pause.
We can import the written program “WirelessCar.hex” directly.
http://wiki.haljia.com/download/microbit/joystick/WirelessCar.hex
Download the program to micro:bit board.
Start to test
Turn on the joystick and the car. If we push the left joystick forward, the car will move forward. If we pull the joystick backward, the car will back off. If the joystick returns to the middle, the car will pause.
Or press button A to forward, press button B to backward, and press button C to pause.

Support
If you need technical support or have any question, please feel free to contact us. We are sure to reply to you within 1~2 working days. When you contact us, don’t forget to attach your order number and shopping platform.
Working Time: 9 AM – 6:30 PM (Monday to Friday)
EMAIL: Support@HALJIA.com